Canning venison is a practice that goes beyond mere food preservation; it connects you to a rich tradition steeped in heritage and purpose. Picture yourself standing in your kitchen, jars lined up and ready for a culinary adventure. There’s something deeply satisfying about transforming freshly harvested venison into shelf-stable meals that can be enjoyed long after the hunting season has ended.
As you embark on this journey, you’re not just preparing food; you’re embracing a lifestyle that values sustainability and self-sufficiency. Canning allows you to make the most of your harvest, ensuring that every cut of meat is utilized, minimizing waste, and enhancing the flavors of the wild game you’ve procured.
This guide is designed for those who may be new to the art of canning. By following these steps, you will gain confidence in your abilities and enjoy the rewards of your efforts. Whether you aim to stock your pantry with delicious meals for busy nights or share your bounty with family and friends, canning venison opens the door to a world of culinary possibilities.
So, let’s begin this journey together. You’ll learn everything from choosing the right equipment to mastering the canning process. With each step, you’ll build your knowledge and skills, ensuring that you can safely and effectively preserve your venison. Get ready to take part in a time-honored tradition that will enhance your culinary repertoire and bring a sense of accomplishment to your kitchen.
Table of Contents
Understanding the Basics of Canning Venison
Before diving into the specifics of canning venison, it’s essential to grasp the fundamental concepts that underpin this method of preservation. Canning is not just about putting food in jars; it’s a science that ensures your meals remain safe and delicious for months, or even years.
What is Canning?
At its core, canning involves sealing food in airtight containers and heating them to a temperature that destroys harmful microorganisms. This process prevents spoilage and preserves the food’s flavor, texture, and nutritional value. You’re creating a barrier against bacteria, molds, and yeasts, which can spoil your food. Understanding this process is crucial for ensuring that your canned venison remains safe to eat.
Why Choose Venison?
Venison, or deer meat, is a lean and flavorful protein that many people enjoy for its unique taste and health benefits. It’s lower in fat than beef and packed with essential nutrients, making it an excellent choice for health-conscious individuals. By canning venison, you’re also supporting sustainable practices. Utilizing meat from wild game reflects a commitment to ethical hunting and resource management, allowing you to appreciate the connection between your meals and the natural world.
The Importance of Safety
Safety is paramount when it comes to canning, especially with low-acid foods like meat. Unlike fruits and pickled vegetables, which can be safely processed using a water bath, venison requires a pressure canner. This specialized equipment reaches higher temperatures necessary to eliminate bacteria and ensure your food is safe for consumption. Understanding this difference is key to successful canning.
As you prepare to can venison, familiarize yourself with the guidelines provided by food safety authorities. Knowledge of safe canning practices will empower you to preserve your meat effectively while minimizing the risk of foodborne illnesses.
By grasping these basics, you are laying the groundwork for a rewarding canning experience. This understanding will guide you through the process, helping you feel confident and informed as you begin to preserve your venison for future enjoyment.
Essential Equipment for Canning Venison
Equipping yourself with the right tools is a vital step in the canning process. Having the proper equipment not only streamlines your efforts but also ensures that you achieve safe and effective results. Here’s what you’ll need to get started on your venison canning journey.
Canning Jars and Lids
First and foremost, you will need high-quality canning jars. These jars come in various sizes, with quart and pint jars being the most popular for canning venison. Quart jars are great for larger portions, while pint jars are perfect for smaller meals or single servings.
When it comes to lids, always opt for new ones. Reusing lids can compromise the seal, which is essential for food safety. The two-piece lid system, consisting of a flat lid and a metal ring, is the most common and reliable choice.
Pressure Canner
A pressure canner is perhaps the most critical piece of equipment for canning venison. Unlike water-bath canning, which is suitable for high-acid foods, a pressure canner reaches the necessary temperatures to safely preserve low-acid foods like meat.
You can choose between a dial gauge or a weighted gauge pressure canner. Both types are effective, but each has its unique features. A weighted gauge is often easier to use, as it automatically regulates the pressure, while a dial gauge allows for more precise monitoring. Make sure to familiarize yourself with the one you choose, ensuring that you understand how to operate it properly.
Other Necessary Tools
In addition to jars and a pressure canner, you’ll want to gather several other handy tools:
- Jar Lifter: This tool is essential for safely removing hot jars from the canner without burning yourself. Its design allows for a secure grip on the jars.
- Funnel: A wide-mouth funnel will help you fill jars without spilling, making the packing process cleaner and more efficient.
- Measuring Cups and Spoons: Accurate measurements of salt and other seasonings are vital for flavor and safety.
- Cleaning Supplies: Keep your workspace tidy by having dish soap, towels, and a cleaner on hand. Maintaining a clean environment is crucial in canning.
By assembling this essential equipment, you are setting yourself up for success in your venison canning adventure. Each tool plays a role in ensuring that your process is safe, efficient, and enjoyable. With everything ready, you’ll feel confident as you dive into the next steps of canning your delicious venison.
Ingredients Needed for Canning Venison
When it comes to canning venison, selecting the right ingredients is crucial for both flavor and safety. You want to ensure that your canned venison not only tastes great but also meets food preservation standards. Here’s what you’ll need to gather before you start the canning process.
Venison
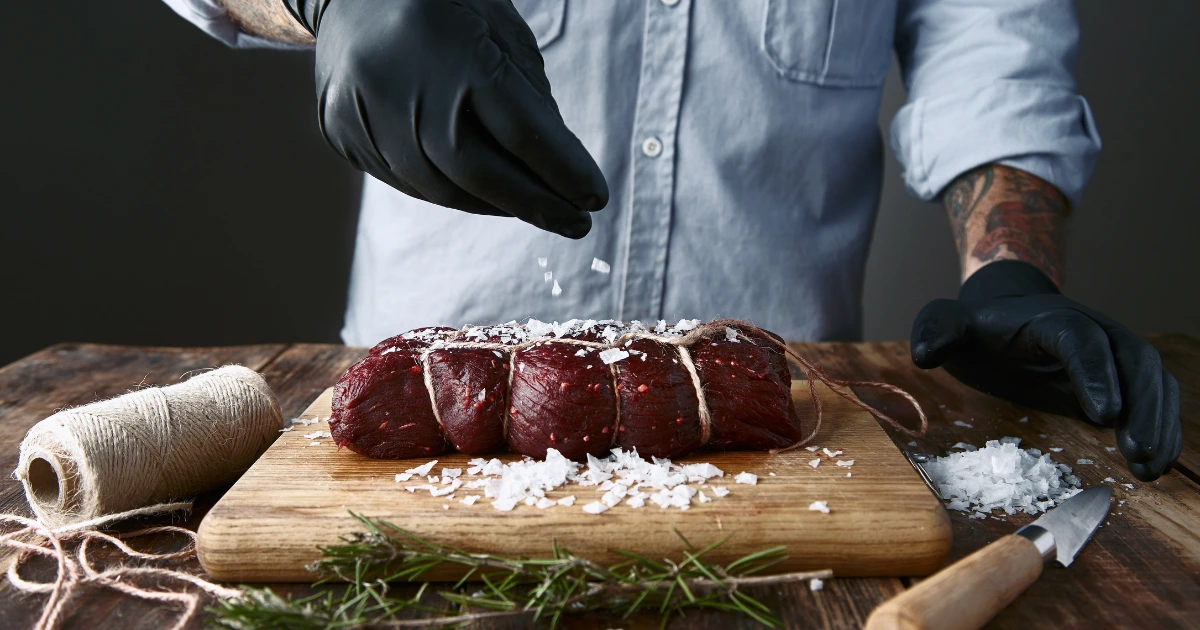
The star ingredient in this process is, of course, the venison itself. Choose high-quality cuts of meat, ideally from a freshly harvested deer. Look for lean pieces, trimming away any excess fat or sinew, as these can lead to spoilage during storage. The better the quality of the meat, the tastier your final product will be.
Salt
Salt plays a vital role in enhancing the flavor of your canned venison. It also helps with preservation, creating an environment that’s less hospitable to bacteria. You should use canning or pickling salt, as these types do not contain additives that can cloud the liquid in your jars. Generally, about 2 teaspoons of salt per quart of meat is recommended, but you can adjust this according to your taste.
Pepper and Seasonings
While venison has a rich flavor of its own, a touch of seasoning can elevate your dish. Ground black pepper is a popular choice, but feel free to experiment with other herbs and spices that you enjoy. Consider garlic powder, onion powder, or even dried herbs like thyme or rosemary. Just keep in mind that adding too much can alter the preservation process, so use seasonings sparingly.
Liquid
You’ll need a liquid to cover the venison in the jars. Options include water, broth, or stock. Broth can enhance the overall flavor and add depth to your canned venison. If you choose to use broth, make sure it’s low-sodium if you’re already adding salt to the meat. The goal is to ensure that your meat is fully submerged in liquid to create a vacuum seal during the canning process.
Optional Ingredients
While the basic ingredients are essential, you can also consider adding optional ingredients to enhance flavor. For instance, diced vegetables like carrots or celery can provide additional nutrients and taste. Just remember that adding these can change the texture and flavor profile of your final product.
Summary Table of Ingredients
| Ingredient | Quantity |
|---|---|
| Venison (trimmed and cubed) | 5 lbs |
| Salt | 2 tsp |
| Pepper | To taste |
| Optional seasonings | Various |
| Liquid (water or broth) | As needed |
By gathering these ingredients, you’re preparing to create a delicious and safe canned venison product. Each component plays a role in both flavor and preservation, ensuring that your efforts yield satisfying results. With everything ready, you’ll soon be on your way to mastering the art of canning venison!
Step-by-Step Guide to Canning Venison
Canning venison might seem daunting at first, but breaking it down into manageable steps makes the process straightforward and rewarding. With your equipment and ingredients ready, you can follow this step-by-step guide to preserve your venison safely and effectively.
Preparing the Venison
- Trimming and Cubing
Start by thoroughly cleaning your workspace and gathering your tools. Take your venison and trim away any excess fat or sinew, as these can affect the quality of the canned meat. Once trimmed, cut the venison into uniform cubes, roughly 1-2 inches in size. This ensures even cooking and packing. - Brining (Optional)
If you want to enhance the flavor and tenderness of your venison, consider brining it before canning. You can prepare a simple brine by dissolving salt in water and soaking the cubed meat for a few hours. This step is optional but can add depth to the flavor.
Canning Process
- Sterilizing Jars
Begin by sterilizing your canning jars. You can do this by placing them in a boiling water bath for about 10 minutes or running them through a hot cycle in your dishwasher. Sterilization is crucial to prevent contamination and ensure food safety. - Packing the Jars
Using a wide-mouth funnel, pack the cubed venison into the sterilized jars. Aim for a tight pack without crushing the meat. Leave about one inch of headspace at the top of each jar. This area provides room for growth while canning. - Adding Liquid
Once the jars are packed with venison, add your chosen liquid—be it water or broth—until the meat is fully submerged, again leaving about an inch of headspace. This liquid helps create the necessary vacuum seal during processing. - Seasoning
Sprinkle the recommended amount of salt and any additional seasonings over the meat in each jar. This step not only enhances flavor but also contributes to the preservation process. - Sealing the Jars
Clean the jar edges with a cloth to get rid of any leftovers that might stop a good seal. Place the flat lid on each jar and secure it with the metal ring. Make sure it’s snug but not overly tight, as air needs to escape during the canning process. - Processing the Jars
Now it’s time to load your jars into the pressure canner. Stick to the guidelines from your machine’s manufacturer. Once loaded, ensure the canner is properly sealed and bring it to the recommended pressure level—typically around 10-15 pounds, depending on your altitude. Process the jars for the specified time, usually around 75-90 minutes for quarts, adjusting for pints as necessary.
After Canning
- Cooling the Jars
When the processing time is done, switch off the heat and let the canner cool on its own. Avoid forcing the pressure to drop, as this can cause jars to break. Once the pressure is fully released, carefully remove the jars using your jar lifter. - Checking the Seals
After the jars have cooled for about 12-24 hours, check each lid to ensure it has sealed properly. The lid should be concave, and you shouldn’t be able to press it down. If any jars haven’t sealed correctly, refrigerate and use them within a few days. - Labeling and Storage
Lastly, mark each jar with what’s inside and the date. Store your canned venison in a cool, dark place—like a pantry or cellar—where it can be kept for up to two years.
By following these detailed steps, you’ll not only preserve your venison but also create delicious meals that you can enjoy throughout the year. The satisfaction of opening a jar of your homemade canned venison is truly rewarding, marking the successful culmination of your efforts.
Tips for Successful Canning


To ensure your canning experience is smooth and yields delicious results, consider these practical tips. These insights will help you avoid common pitfalls and enhance the quality of your canned venison.
Understand Temperature and Timing
One of the most critical aspects of canning is adhering to the correct temperature and processing times. Low-acid foods like venison require specific pressure levels to eliminate harmful bacteria. Familiarize yourself with the recommended processing times based on the size of your jars and the type of pressure canner you’re using. Investing in a reliable pressure gauge can help you monitor the pressure accurately throughout the process.
Prepare Your Workspace
A tidy and organized workspace can greatly improve your productivity. Before you start, ensure that all your tools and ingredients are within reach. Lay out a clean surface to work on, and keep a towel handy for any spills. This preparation will help you focus on the task at hand, making the process more efficient and enjoyable.
Choose Quality Ingredients
Using the best quality ingredients will greatly impact the flavor and safety of your finished product. Opt for fresh, high-quality venison, and make sure your other ingredients—such as salt, broth, and seasonings—are also top-notch. The effort you put into selecting your ingredients will pay off in the taste of your canned venison.
Don’t Skip the Headspace
Leaving the correct amount of headspace in your jars is vital for a proper seal. Too little headspace can cause liquid to boil over during processing, which may prevent the jar from sealing correctly. Conversely, too much headspace can lead to air pockets, which may compromise the preservation of the meat. Aim for about an inch of headspace, especially when packing in solid ingredients.
Label Your Jars
Once your jars are sealed and cooled, take the time to label them with the contents and date. This simple step will help you keep track of what you have and when it was canned, ensuring that you use the oldest jars first. Knowing what’s in your pantry will make meal planning easier and reduce food waste.
Store Properly
After labeling, store your canned venison in a cool, dark place, away from direct sunlight. Ideal storage conditions enhance shelf life and maintain the quality of your food. Avoid areas with fluctuating temperatures, as this can impact the integrity of the seals.
Practice Patience
Canning is a process that requires patience, especially if you are new to it. Don’t rush through the steps, and take the time to double-check your work. Each phase, from preparation to storage, is important for ensuring safety and quality. Enjoy the process and the satisfaction that comes from preserving your own food.
By following these tips, you can enhance your canning experience and produce delicious, safe canned venison that you’ll be proud to share with family and friends. With a little preparation and attention to detail, you’ll become more confident in your canning skills, ensuring that your efforts yield fulfilling and flavorful results.
Tips for Successful Canning
To ensure your canning experience is smooth and yields delicious results, consider these practical tips. These insights will help you avoid common pitfalls and enhance the quality of your canned venison.
Understand Temperature and Timing
One of the most critical aspects of canning is adhering to the correct temperature and processing times. Low-acid foods like venison require specific pressure levels to eliminate harmful bacteria. Familiarize yourself with the recommended processing times based on the size of your jars and the type of pressure canner you’re using. Investing in a reliable pressure gauge can help you monitor the pressure accurately throughout the process.
Prepare Your Workspace
A clean and organized workspace can make a significant difference. Before you start, ensure that all your tools and ingredients are within reach. Lay out a clean surface to work on, and keep a towel handy for any spills. This preparation will help you focus on the task at hand, making the process more efficient and enjoyable.
Choose Quality Ingredients
Using the best quality ingredients will greatly impact the flavor and safety of your finished product. Opt for fresh, high-quality venison, and make sure your other ingredients—such as salt, broth, and seasonings—are also top-notch. The effort you put into selecting your ingredients will pay off in the taste of your canned venison.
Don’t Skip the Headspace
Leaving the correct amount of headspace in your jars is vital for a proper seal. Too little headspace can cause liquid to boil over during processing, which may prevent the jar from sealing correctly. Conversely, too much headspace can lead to air pockets, which may compromise the preservation of the meat. Aim for about an inch of headspace, especially when packing in solid ingredients.
Label Your Jars
Once your jars are sealed and cooled, take the time to label them with the contents and date. This simple step will help you keep track of what you have and when it was canned, ensuring that you use the oldest jars first. Knowing what’s in your pantry will make meal planning easier and reduce food waste.
Store Properly
After labeling, store your canned venison in a cool, dark place, away from direct sunlight. Ideal storage conditions enhance shelf life and maintain the quality of your food. Avoid areas with fluctuating temperatures, as this can impact the integrity of the seals.
Practice Patience
Canning is a process that requires patience, especially if you are new to it. Don’t rush through the steps, and take the time to double-check your work. Each phase, from preparation to storage, is important for ensuring safety and quality. Enjoy the process and the satisfaction that comes from preserving your own food.
By following these tips, you can enhance your canning experience and produce delicious, safe canned venison that you’ll be proud to share with family and friends. With a little preparation and attention to detail, you’ll become more confident in your canning skills, ensuring that your efforts yield fulfilling and flavorful results.
Common Mistakes to Avoid
When canning venison, even small oversights can lead to unsafe products or unsatisfactory results. Being aware of common mistakes can help you navigate the process more effectively. Here are some common mistakes to look out for and tips on how to prevent them.
Underprocessing the Jars
One of the most critical errors you can make is not processing your jars for the recommended time. Underprocessing can fail to eliminate harmful bacteria, putting your food at risk. Always refer to reliable canning guides for specific times based on your jar size and the type of pressure canner you’re using. Trusting your instincts instead of following established guidelines can be dangerous, so stick to the recommended processing times.
Ignoring Equipment Maintenance
Your canning equipment plays a crucial role in the safety and success of your process. Neglecting the maintenance of your pressure canner, especially its gauge, can lead to inaccurate pressure readings and unsafe canning conditions. Regularly check and calibrate your equipment according to the manufacturer’s instructions. If your gauge is faulty, consider replacing it to ensure reliable performance.
Using Improper Jars and Lids
Not all jars are created equal when it comes to canning. Avoid using old or non-canning jars, such as those from store-bought products, as they may not withstand the canning process. Always use jars specifically designed for home canning, and remember that lids should be new to ensure a proper seal. Reusing lids can compromise the safety of your preserved food.
Skipping the Sterilization Step
Some may think they can skip sterilizing jars, especially if they appear clean. However, this step is vital in preventing spoilage and contamination. Always sterilize your jars before filling them, even if they look spotless. Using a hot water bath or a dishwasher’s sterilization cycle is an effective way to ensure cleanliness.
Failing to Leave Adequate Headspace
Leaving the right amount of headspace in your jars is essential for a successful seal. If you pack the jars too tightly or fill them to the brim, you risk compromising the jar’s ability to form a vacuum seal. Aim for about one inch of headspace to allow for expansion during processing. This small detail makes a significant difference in the quality and safety of your canned venison.
Not Checking Seals Properly
After the jars cool, it’s important to check that they’ve sealed correctly. Sometimes, a jar may look sealed but isn’t, leading to spoilage. To test the seal, press down in the center of the lid; it should not pop back. If it does, store that jar in the fridge and use it within a few days. This simple check can save you from discovering a spoiled jar after months of storage.
Overfilling the Canner
When placing jars in the pressure canner, avoid overcrowding. Overfilling can prevent proper heat circulation, which is crucial for effective processing. Make sure there’s enough space between jars for steam to circulate freely. This practice will help ensure that all jars are processed evenly and safely.
By keeping these common mistakes in mind and taking steps to avoid them, you can enhance the safety and quality of your canned venison. Awareness and attention to detail will lead to a more successful canning experience, allowing you to enjoy the fruits of your labor for months to come.
(FAQ)
As you embark on your canning journey, you may have questions about the process and what it entails. Here are some frequently asked questions that can help clarify any uncertainties and guide you in successfully canning venison.
Can I can venison without a pressure canner?
Canning venison without a pressure canner is not recommended. Venison is a low-acid food, which means it requires higher temperatures to safely eliminate harmful bacteria. A pressure canner reaches the necessary temperatures that boiling water cannot achieve, making it essential for safely preserving meat. Skipping this step can put your food at risk, so always use a pressure canner for canning venison.
How long does canned venison last?
When kept correctly, canned venison can last for up to two years. However, for the best quality and taste, it’s advisable to consume it within one year. Always check for signs of spoilage, such as unusual odors or bulging lids, before using any canned product. By labeling your jars with the date, you can easily keep track of their age and ensure you use the oldest jars first.
What can I do with canned venison?
Canned venison offers a variety of culinary possibilities. You can use it in stews, soups, tacos, or even as a protein addition to salads. The convenience of having venison ready to use in your pantry can save you time on busy days. Just open a jar, heat it up, and incorporate it into your favorite recipes.
Is it safe to can venison at home?
Yes, canning venison at home is safe as long as you follow proper canning guidelines and practices. Use a reliable pressure canner, adhere to recommended processing times, and ensure your ingredients are fresh. By being diligent and informed, you can safely preserve your venison for future meals.
Can I include vegetables or other ingredients in the jars?
While you can add vegetables or other ingredients, it’s important to do so with caution. Adding too many low-acid ingredients can alter the safety and processing time of your canned venison. If you choose to include vegetables, make sure to consult reliable canning resources for guidance on how to adjust processing times accordingly. Keeping the focus primarily on the venison will help ensure safety and quality.
What should I do if a jar doesn’t seal properly?
If a jar doesn’t seal correctly after cooling, don’t panic. Simply refrigerate the unsealed jar and use the contents within a few days. You can also reprocess the jar by removing the lid, checking for any residue, and then refilling and resealing it. Make sure to process it again for the correct amount of time to ensure safety.
Can I reuse canning lids?
Reusing canning lids is not recommended. While the metal rings can be reused, the flat lids should always be new to ensure a proper seal. Old lids may not form a secure vacuum seal, increasing the risk of spoilage. Investing in new lids is a small price to pay for the safety of your preserved food.
By addressing these frequently asked questions, you can feel more confident as you embark on your canning adventure. With the right knowledge and preparation, you’ll be well-equipped to preserve your venison safely and enjoy the delicious results for months to come.
Conclusion
Canning venison is not just a practical skill; it’s an enriching experience that connects you to your food and the traditions of preservation. Throughout this guide, you’ve learned the essential steps, from preparing your ingredients to the canning process itself. By mastering these techniques, you equip yourself with the ability to enjoy the flavors of your harvest long after the hunting season has ended.
As you embark on your canning journey, remember that success comes from attention to detail and a commitment to safety. By following the guidelines and avoiding common pitfalls, you’ll create delicious, shelf-stable meals that can nourish you and your loved ones. The satisfaction of opening a jar of your own canned venison, knowing the care and effort you put into it, is truly rewarding.
Embrace the opportunity to experiment with flavors and recipes. Canned venison can seamlessly fit into your meal planning, providing versatility and convenience. Whether you’re making hearty stews, flavorful tacos, or simply enjoying it as a protein-packed addition to your meals, the possibilities are endless.
In summary, canning venison is a valuable skill that enhances your culinary repertoire and promotes self-sufficiency. With the knowledge you’ve gained, you can confidently embark on this journey, ensuring that your hard-earned venison is preserved safely and enjoyed for months to come. So gather your tools, prepare your ingredients, and take pride in the art of canning. Your efforts will result in flavorful meals that bring warmth and satisfaction throughout the year.